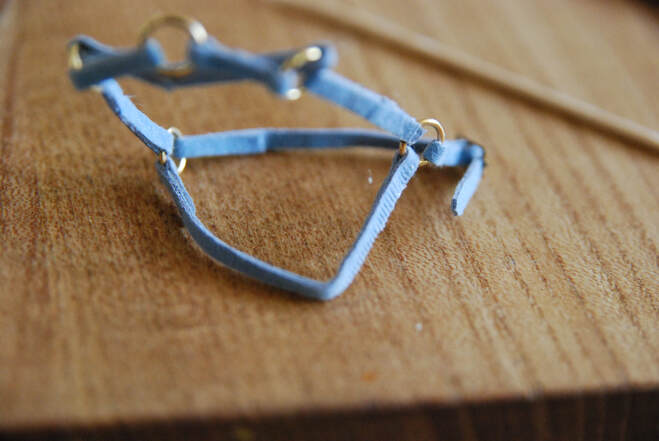
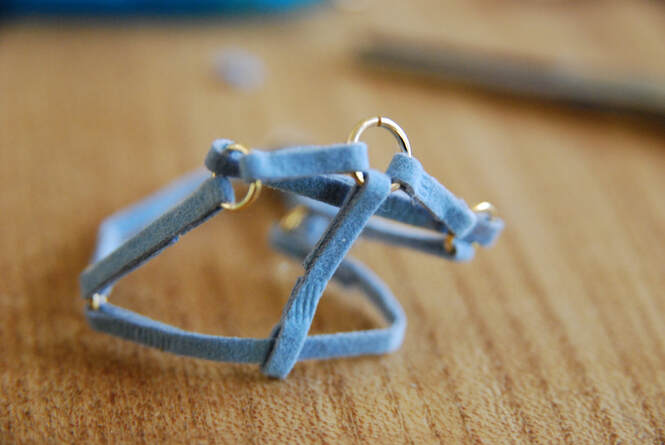
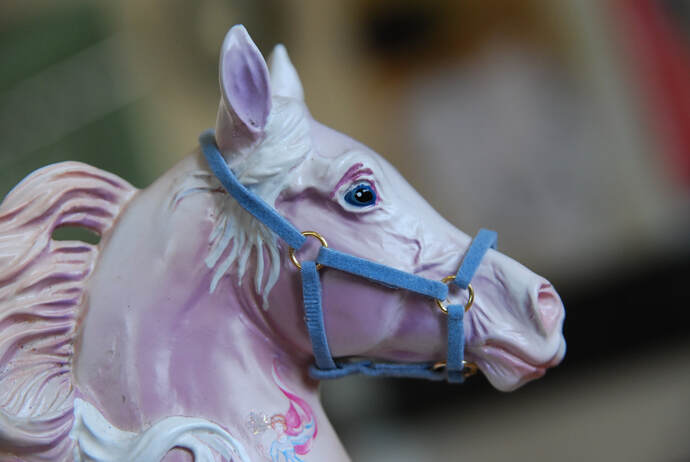
This tutorial was written in 2011 and will show you how to create a simple headcollar for your model horses.
The tutorial is designed for Traditional scale models but can easily be adapted to fit other scales. We recommend you try it out for Traditional scale first and then work on adapting it to other scales. You can also adapt it to add your own decoration, tooling and different shapes for a more decorative finish. The approximate cost is based on you purchasing all the supplies and tools needed for this project.
Difficulty Level: Easy
Approximate Cost: £9.50
Safety warning: This tutorial involves the use of sharp blades, knives and scissors. If you are under 18 years old please get an adult to help you and always use appropriate safety protection.
Shopping List
Supplies
3mm (1/8") Ribbon (or Leather Lace/Suede Lace) x1m
4x 6mm Jump Rings
1x 5mm Jump Ring
1x 1/8" Buckle
Tools Needed
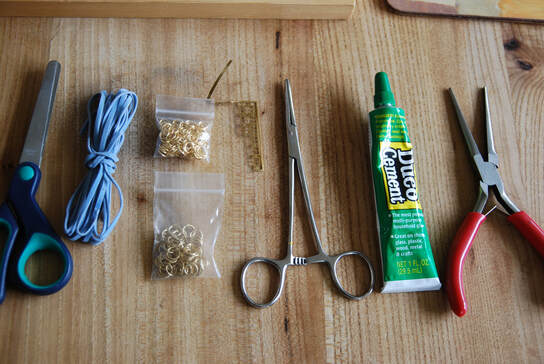
Scissors
Glue
Clamp/Bulldog Clips/Forceps
Needlenose Pliers
3mm (1/8") Ribbon (or Leather Lace/Suede Lace) x1m
4x 6mm Jump Rings
1x 5mm Jump Ring
1x 1/8" Buckle
Tools Needed
Scissors
Glue
Clamp/Bulldog Clips/Forceps
Needlenose Pliers
Step 1
Get all your tools ready. We recommend you fit your headcollar to your model horse as you go to ensure it is the right size. The measurements used here are guides only.
Get all your tools ready. We recommend you fit your headcollar to your model horse as you go to ensure it is the right size. The measurements used here are guides only.
Step 2
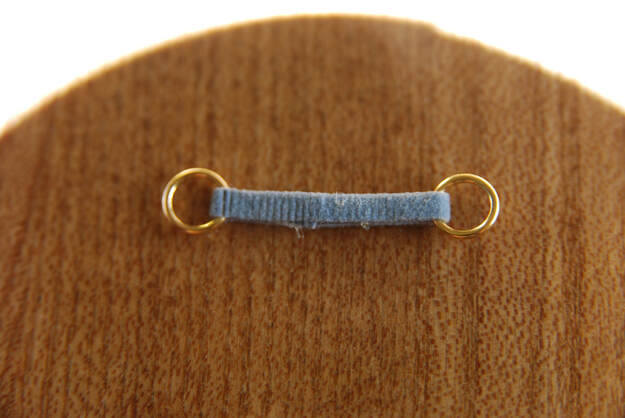
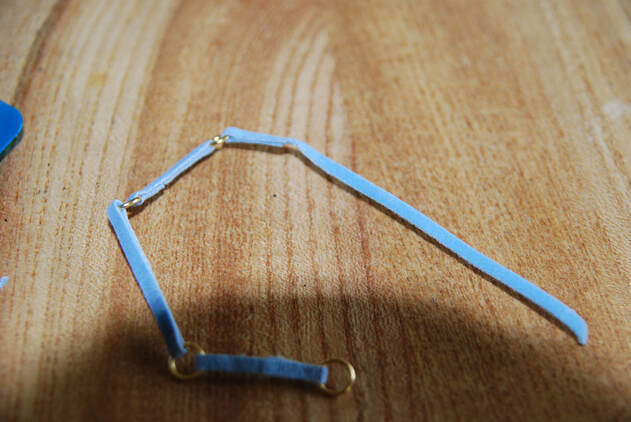
Cut 3cm of ribbon and attach a 6mm jump ring on each end. This is your noseband.
To attach a jump ring fold the ribbon over and around the jump ring and then glue it back on itself.
Cut 3cm of ribbon and attach a 6mm jump ring on each end. This is your noseband.
To attach a jump ring fold the ribbon over and around the jump ring and then glue it back on itself.
Step 3
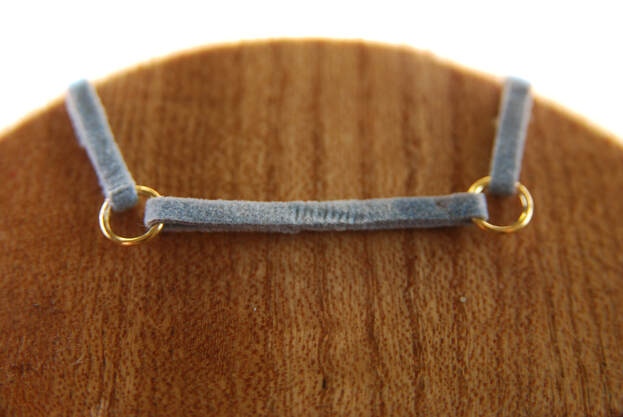
Cut 2x 4cm pieces of ribbon. These are your cheekpieces.
Attach each one to each of the two jump rings from Step 2. You should form a 'U' shape as shown.
On each end attach another 6mm jump ring.
Cut 2x 4cm pieces of ribbon. These are your cheekpieces.
Attach each one to each of the two jump rings from Step 2. You should form a 'U' shape as shown.
On each end attach another 6mm jump ring.
Step 4
Cut 7cm of ribbon. On one end cut into an arrow point (taper). This is your headband.
Hold the headcollar so it is a 'U' shape. Attach this to the left hand jump ring.
Cut 7cm of ribbon. On one end cut into an arrow point (taper). This is your headband.
Hold the headcollar so it is a 'U' shape. Attach this to the left hand jump ring.
Step 5
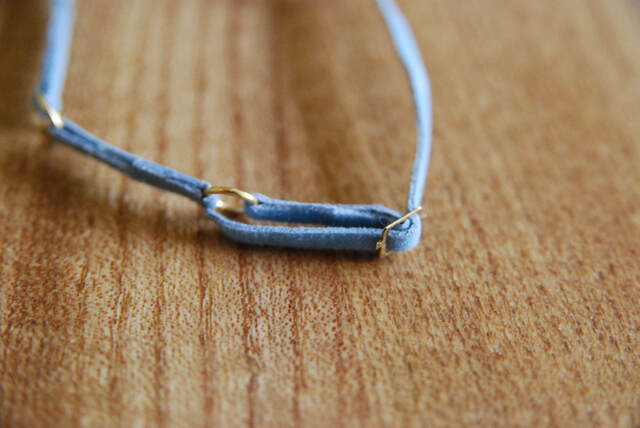
Cut 2cm of ribbon. This will be your headband buckle piece.
Attach one end to the spare jump ring on the right hand cheek piece.
Attach a buckle to the other end of the ribbon.
To attach a slip buckle pass the ribbon up and over the centre bar and glue back down.
Cut 2cm of ribbon. This will be your headband buckle piece.
Attach one end to the spare jump ring on the right hand cheek piece.
Attach a buckle to the other end of the ribbon.
To attach a slip buckle pass the ribbon up and over the centre bar and glue back down.
Step 6
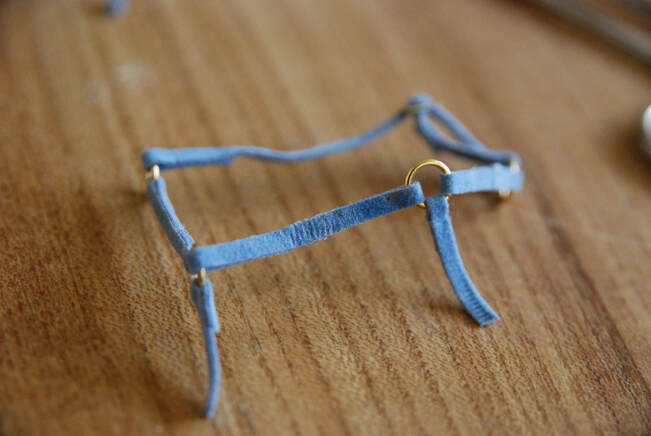
Cut 2x 1.5cm of ribbon. This will form the bottom of your noseband.
Glue the first piece to one of the noseband jump rings. To figure out where to attach it hold the noseband against your horse. This is the bottom of the noseband. The left hand piece should go to the left of the noseband and right of the cheekpiece. The right hand piece should go to the right of the noseband and left of the cheekpiece.
Glue both on as shown.
Step 7
Attach a 5mm jump ring between these the two noseband pieces.
Attach a 5mm jump ring between these the two noseband pieces.
Step 8
Cut 3.5cm of ribbon. This will be your throatlatch.
Find the jump rings that have your headband on. This is basically the underside of the headband! Attach the left hand end to the right of the cheekpiece and left of the headband strap.
Attach the other end to the opposite jump ring.
Cut 3.5cm of ribbon. This will be your throatlatch.
Find the jump rings that have your headband on. This is basically the underside of the headband! Attach the left hand end to the right of the cheekpiece and left of the headband strap.
Attach the other end to the opposite jump ring.
Step 9
Cut 3.5cm of ribbon. This is your connecting strap.
Fold the first end over the throatlatch and glue down. Attach the other end to the jump ring at the bottom of the noseband. Make sure you glue it so that the tabs face up towards the horses face.
Cut 3.5cm of ribbon. This is your connecting strap.
Fold the first end over the throatlatch and glue down. Attach the other end to the jump ring at the bottom of the noseband. Make sure you glue it so that the tabs face up towards the horses face.
Step 10
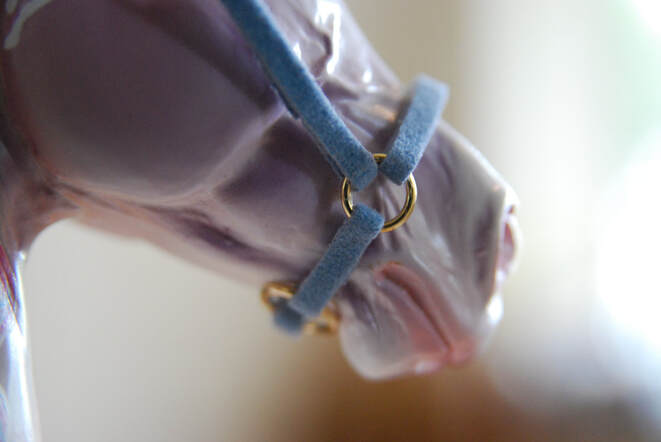
Your headcollar is now complete! Fit it to your horse and make any adjustments as needed.
Your headcollar is now complete! Fit it to your horse and make any adjustments as needed.
Finishing Your Piece
Once done you can decorate your headcollar with decorative plates or gems.
We would love to see some pictures if your completed pieces to feature in our gallery. Please email them to [email protected] and we will feature them below.
We would love to see some pictures if your completed pieces to feature in our gallery. Please email them to [email protected] and we will feature them below.
Video Tutorial
The below video was a live seminar done in April 2020. You can watch the steps as we put together a similar headcollar to the one here and also respond to some viewer questions.
Gallery of Finished Pieces
The below gallery features some completed tack made using this tutorial.

