A Facebook page can be a great way for you to share your work with the wider model horse community and improve your customer base. It can also be a fun way to share pictures of your model horses or even run a model horse competition or show. A quick search on Facebook will find you a wealth of different pages devoted to all aspects of the model horse hobby.
Written in late 2017 this tutorial will take you step by step through the process of setting up your own Facebook page. If you are interested you can view the completed page we made here: www.facebook.com/recycledliveshows/
Written in late 2017 this tutorial will take you step by step through the process of setting up your own Facebook page. If you are interested you can view the completed page we made here: www.facebook.com/recycledliveshows/
Setting Up Your Page
Step 1
The first step is to find the button to create a page. If you head to an existing Facebook page (such as the Chestnut Ridge one shown below) you can click 'Create a Page' at the bottom right of the list of different page elements.
The first step is to find the button to create a page. If you head to an existing Facebook page (such as the Chestnut Ridge one shown below) you can click 'Create a Page' at the bottom right of the list of different page elements.
Step 2
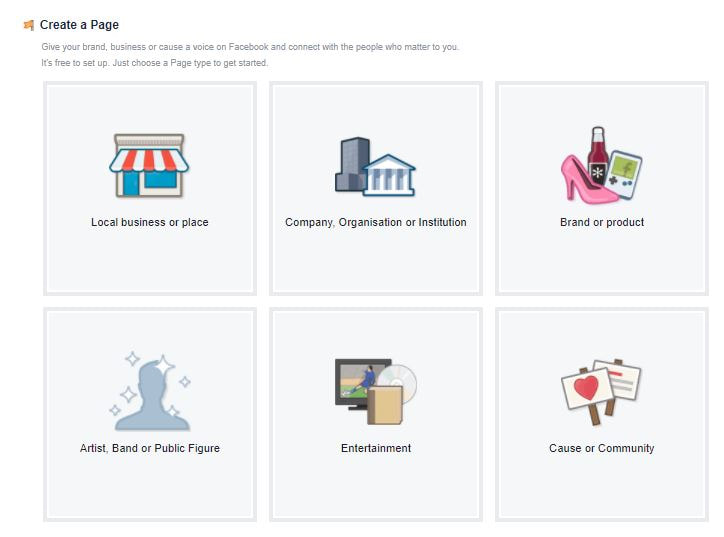
You will now need to decide on the type of page you want to set up. Choose the one that you think matches what you are going to use it for best. For example a custom studio may choose 'local business or place' whilst a live show might choose 'cause or community'.
You will now need to decide on the type of page you want to set up. Choose the one that you think matches what you are going to use it for best. For example a custom studio may choose 'local business or place' whilst a live show might choose 'cause or community'.
Step 3
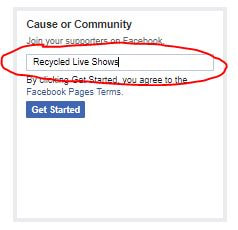
Now you need to name your page! We are making a page for our Recycled Live Shows series so that is the name we've chosen. Some artists like to put 'art by X' after the name of their studio to make it easier for customers to find.
Now you need to name your page! We are making a page for our Recycled Live Shows series so that is the name we've chosen. Some artists like to put 'art by X' after the name of their studio to make it easier for customers to find.
Step 4
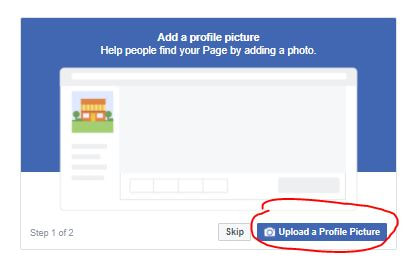
Your page is now alive! You will now need to start to set up the various different elements. First up let's choose a profile picture. This is the main image that everyone will see when you post. It will fit into a square box so choose something that can easily be cut.
Click on the 'Upload a Profile Picture' button.
Step 5
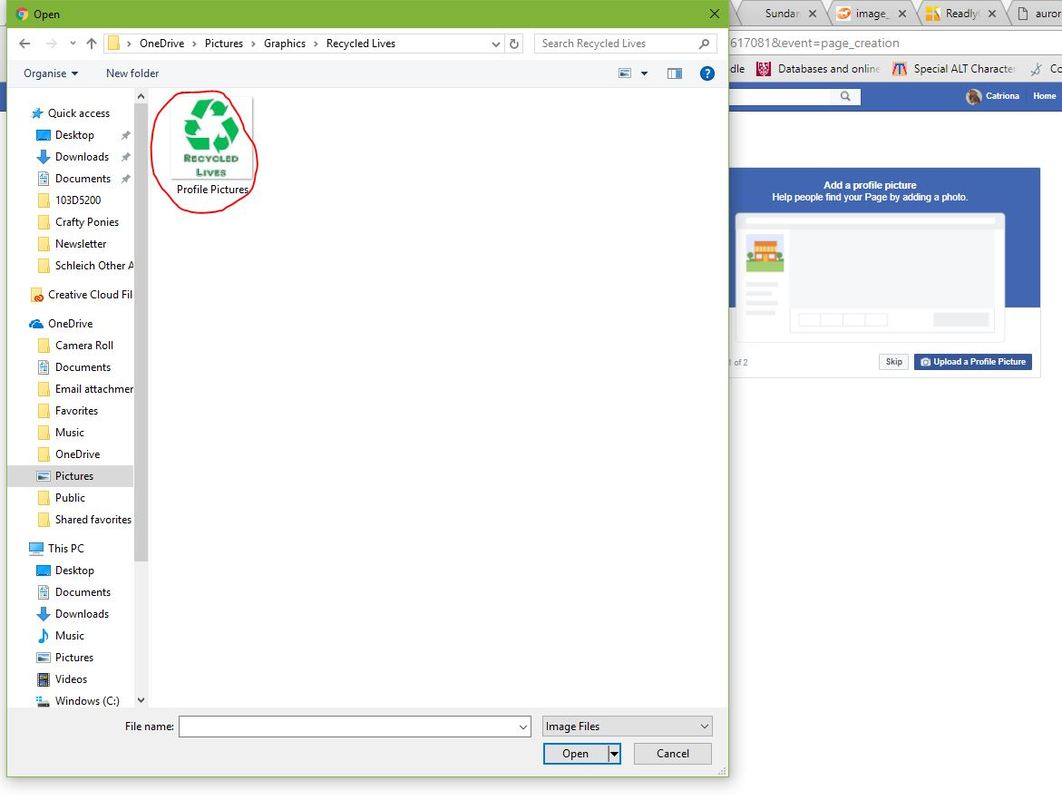
This will open the files on your computer. Navigate through your own images until you find one you like. Click on the image to select it and then click 'open'. You now have a profile picture!
This will open the files on your computer. Navigate through your own images until you find one you like. Click on the image to select it and then click 'open'. You now have a profile picture!
Step 6
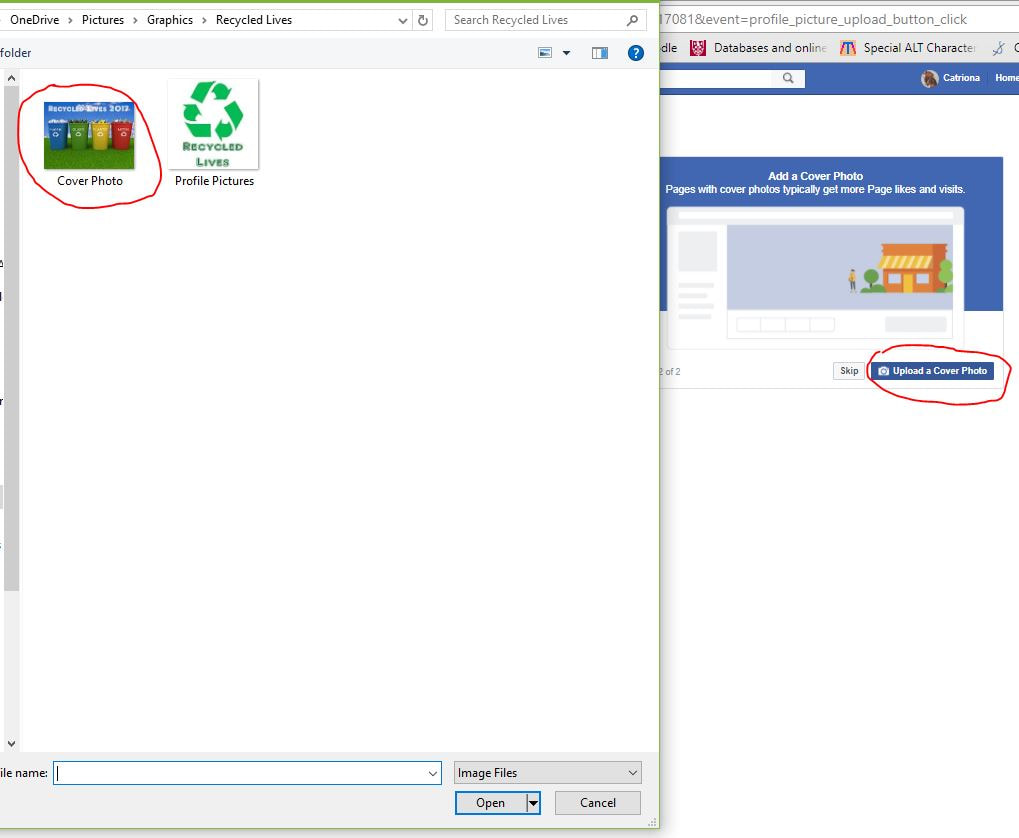
We are now going to add a cover photo. This is the image that will go across the top of your Facebook page like a banner. It needs to be a long rectangle or an image that will look good cropped to this. Most sideways model horses look good.
Click 'Upload a Cover Photo'.
Now navigate through your files as you did before until you've found the one you want. Select this image and then click 'open'.
Step 7
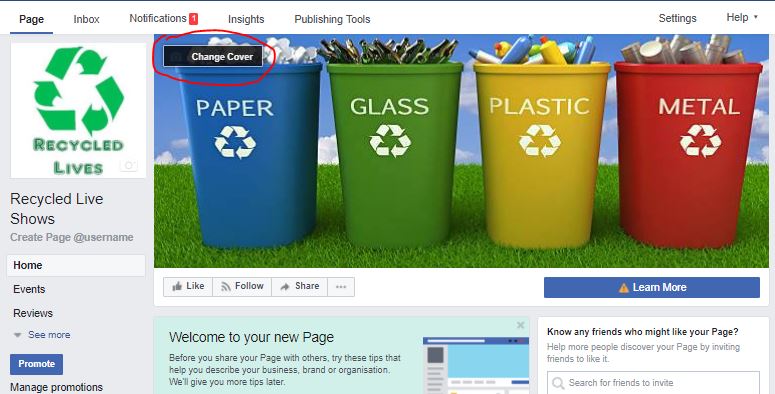
You'll probably find that your cover photo looks a bit weird! But don't worry, you can adjust its layout to give a better appearance. Hover your mouse over the cover photo and then click 'change cover'.
You'll probably find that your cover photo looks a bit weird! But don't worry, you can adjust its layout to give a better appearance. Hover your mouse over the cover photo and then click 'change cover'.
Step 8
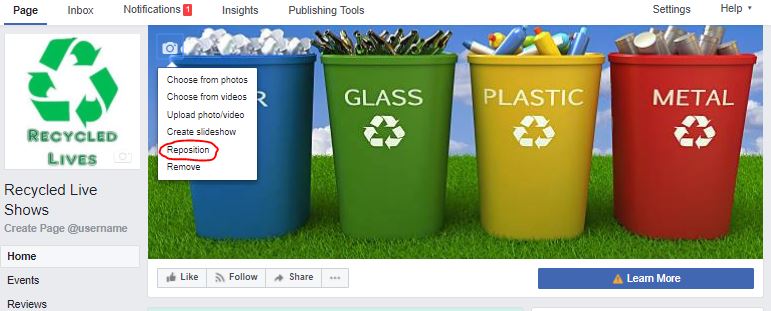
Click 'Reposition' to move your cover photo to a new position, you'll be able to drag it up and down until you get the look you want. If you want to try another photo click 'Upload photo/video' and repeat steps 6-9.
Click 'Reposition' to move your cover photo to a new position, you'll be able to drag it up and down until you get the look you want. If you want to try another photo click 'Upload photo/video' and repeat steps 6-9.
Step 9
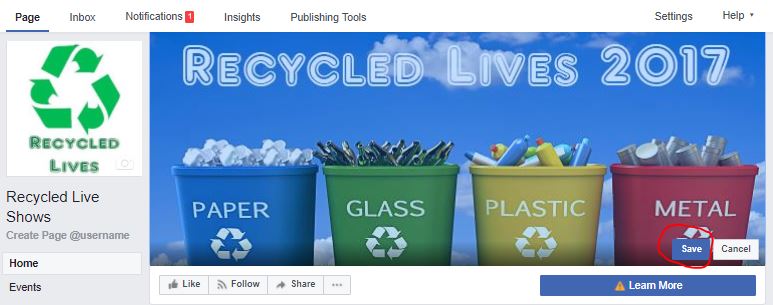
Drag your image up and down until you get the look you want. Once you are happy with the position click 'Save'.
Drag your image up and down until you get the look you want. Once you are happy with the position click 'Save'.
Step 10
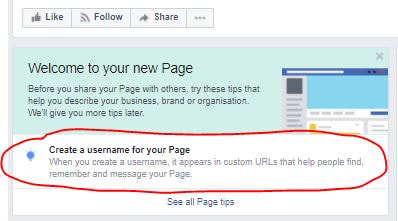
We now need to give your page a custom username. That means that instead of the web address being facebook.com/*a load of numbers* it will instead be the name of your page.
On the list of tasks under the Welcome to Your New Page Button click 'Create a Username For Your Page' (if this isn't here you should find it on the left under the page name, see the left hand side of the image in Step 9).
Step 11
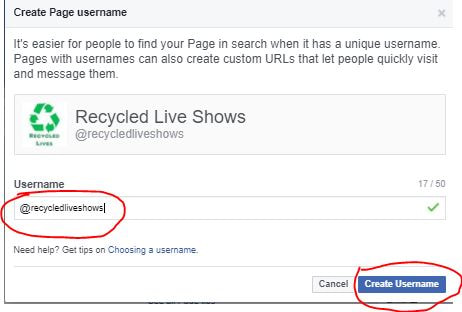
In the box that now appears type the username you want. I recommend you use your page name, or a shortened version of it. We've gone with recycledliveshows.
Once you are happy with your username click 'Create Username'.
In the box that now appears type the username you want. I recommend you use your page name, or a shortened version of it. We've gone with recycledliveshows.
Once you are happy with your username click 'Create Username'.
Step 12
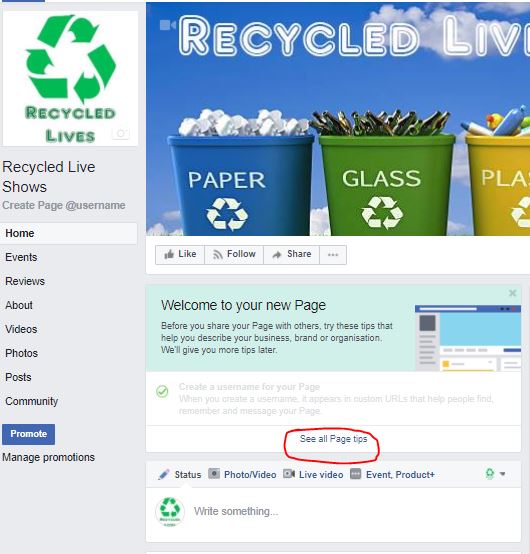
The easiest way to go through all the things you need to do to set up your page is to work through the Facebook set up. Click 'See All Page Tips' to do this.
The easiest way to go through all the things you need to do to set up your page is to work through the Facebook set up. Click 'See All Page Tips' to do this.
Step 13
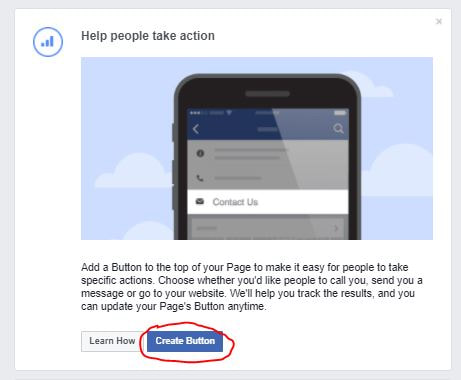
The first step is to create your 'Call to Action' button. This button is the blue button you see on the top right of Facebook pages. It will say things like 'Shop' or 'Donate' and is how you push people to interact with your page or visit your website.
Click 'Create Button'.
The first step is to create your 'Call to Action' button. This button is the blue button you see on the top right of Facebook pages. It will say things like 'Shop' or 'Donate' and is how you push people to interact with your page or visit your website.
Click 'Create Button'.
Step 14
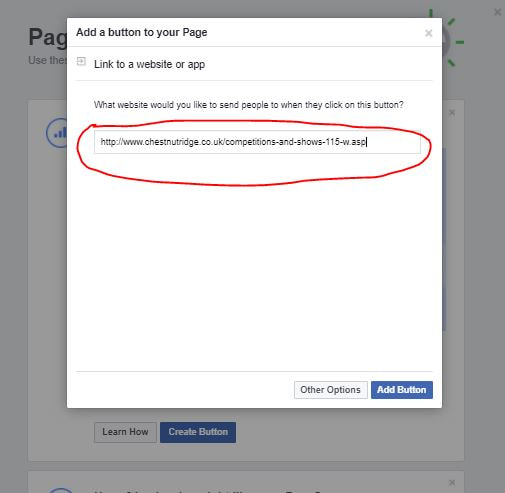
We are going to show you how to create a button that links to a website, but you may also like to simply have one that gets people to message you (if you want another choice click on 'Other Options' at the bottom).
Copy and paste the web address you want people to be sent to into the box. Then click 'Add Button'.
Step 15
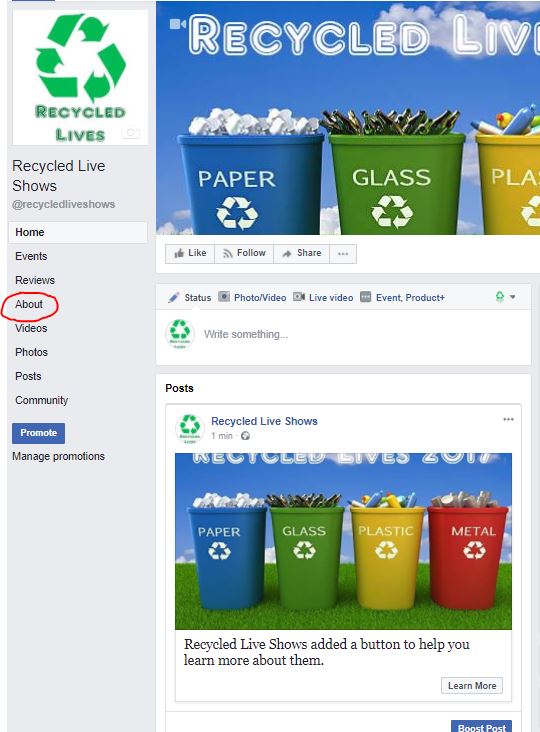
So we now have a link to our website, a profile picture, a custom username and a cover photo! But how will people know what we actually do? On your Facebook page click on the button labelled 'About' on the left hand side.
So we now have a link to our website, a profile picture, a custom username and a cover photo! But how will people know what we actually do? On your Facebook page click on the button labelled 'About' on the left hand side.
Step 16
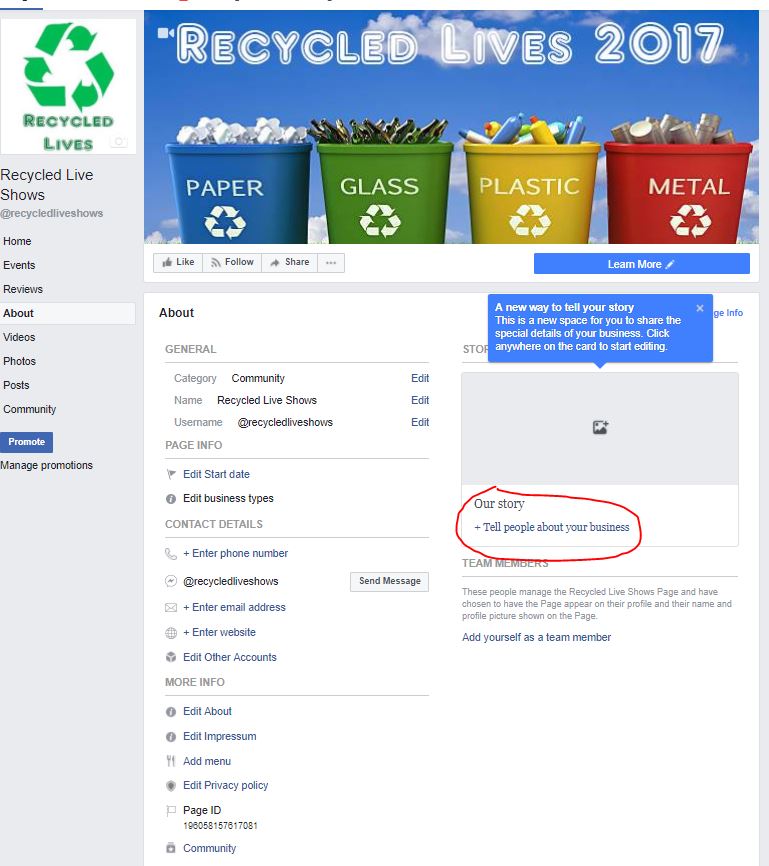
You'll see lots of different things you can add but we are going to start with 'Our Story'. This is basically the about me section of your Facebook page.
Click on the slightly blue text that says 'Tell People About Your Business'.
You'll see lots of different things you can add but we are going to start with 'Our Story'. This is basically the about me section of your Facebook page.
Click on the slightly blue text that says 'Tell People About Your Business'.
Step 17
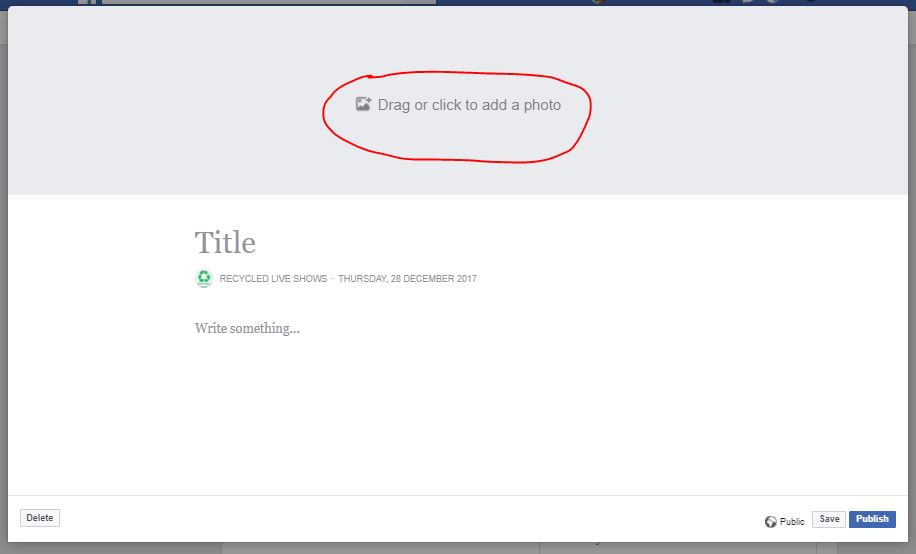
This will open the following page. The first thing to do is to add a picture. This will appear on the right hand side of the page so choose something that looks inviting.
Click 'Drag or Click to Add a Photo'. Now navigate through your files as you did before until you find one you like. Select that image and then click 'open'.
Step 18
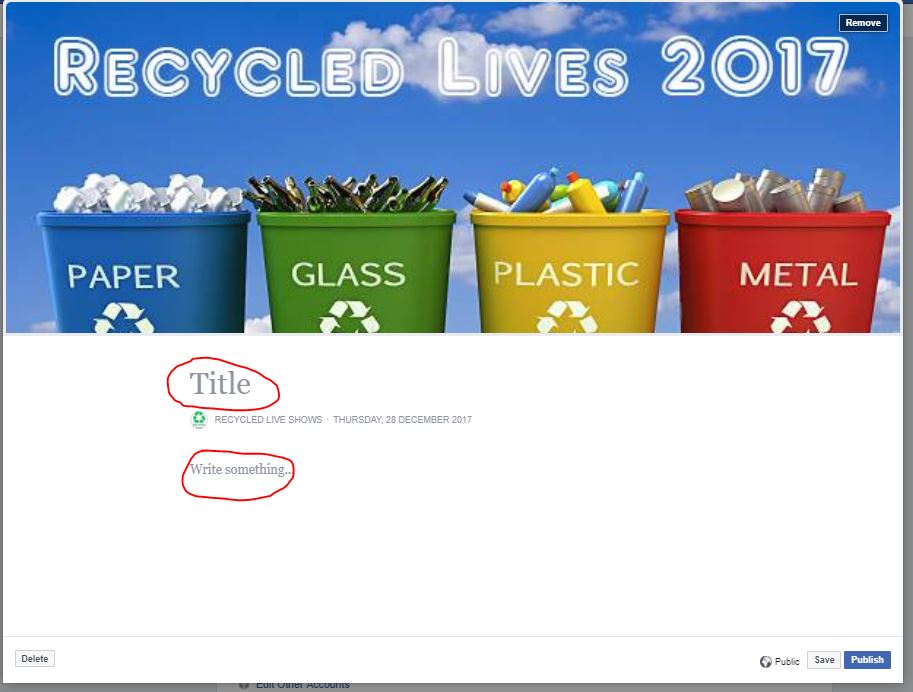
You now need to write something about your page. First start with the Title. Click on where it says 'Title'. You could choose something simple like 'About X' or 'Hello and Welcome' it's entirely up to you.
Once that is done click where it says 'Write Something' and write a bit about your page. Maybe you want to talk about what you do or where you came from. You could provide information on how people can access your services or enter your event. Try to keep it reasonably brief and informative!
Step 19
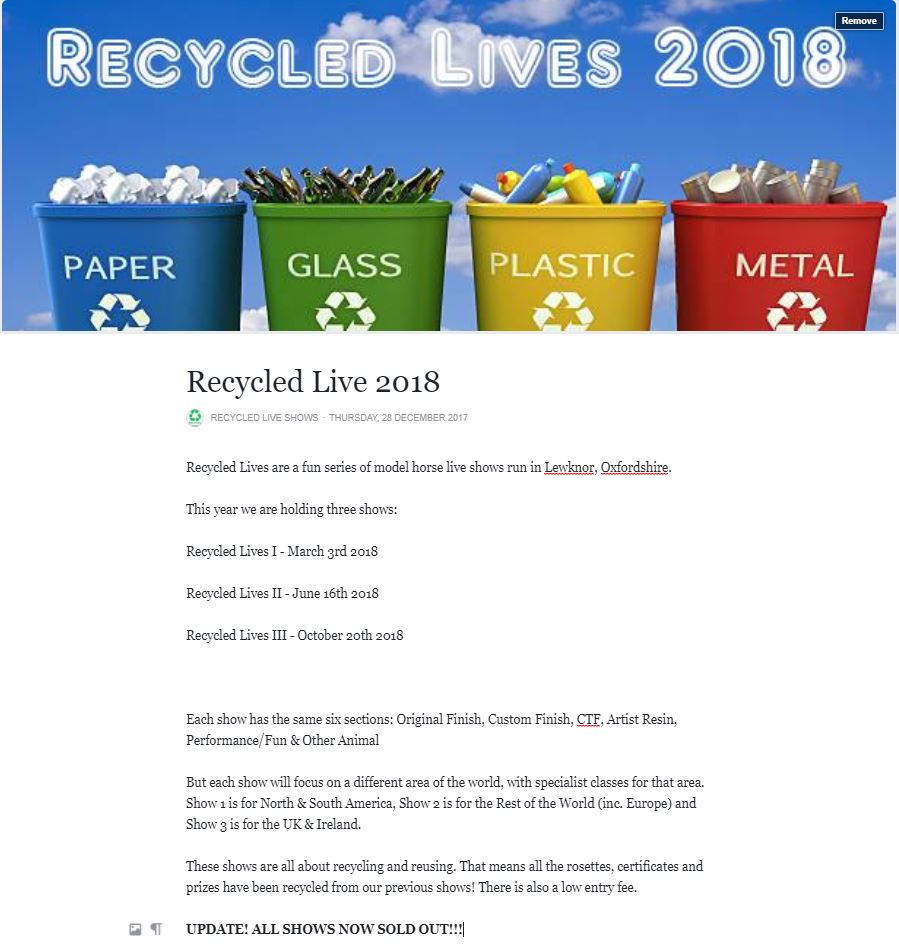
Read through what you have written to check your are happy with it
Read through what you have written to check your are happy with it
Step 20
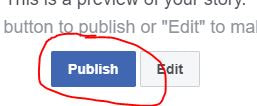
Once you are done click the 'Publish' button and you are away!
Once you are done click the 'Publish' button and you are away!
Step 21
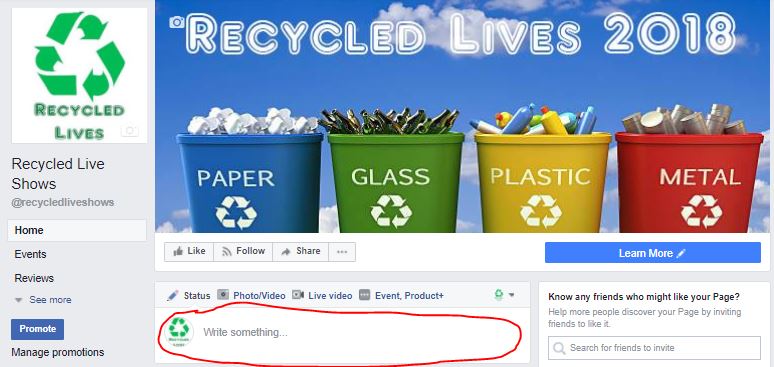
Your new Facebook page is now complete. The only thing to do now is to write your first status. On the main page click in the box that says 'Write Something'.
Your new Facebook page is now complete. The only thing to do now is to write your first status. On the main page click in the box that says 'Write Something'.
Step 22
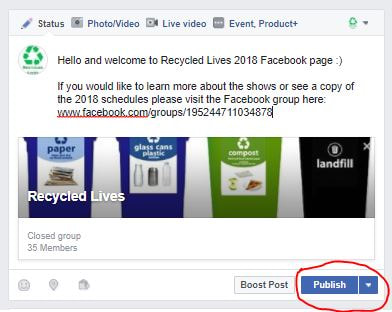
Once you have written your status and are happy with it click 'Publish'
Once you have written your status and are happy with it click 'Publish'
Your new Facebook page is now complete and ready to go! Share it with your friends and in model horse groups to get followers and start to update it regularly.
Have a look around the various different functions available to you, add galleries of your work or images of raffle prizes. Provide regular updates to keep people interested and even add products that you want to sell!
If you've followed this tutorial and set up a Facebook page using it we would love to feature it below! Drop me an email at [email protected] and we will provide a link (subject to content of Facebook page - this is a model horse site and is regularly frequented by those under 18 years of age).


