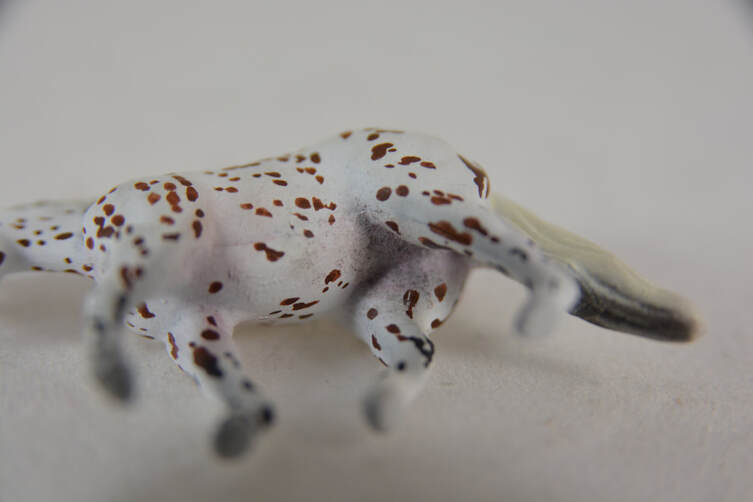
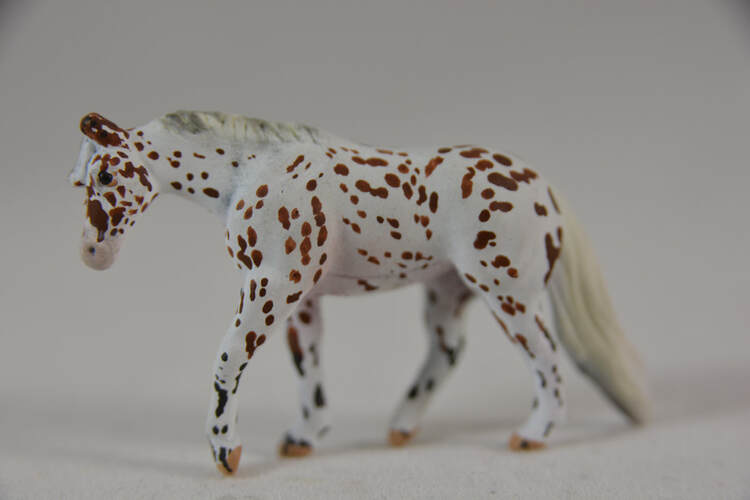
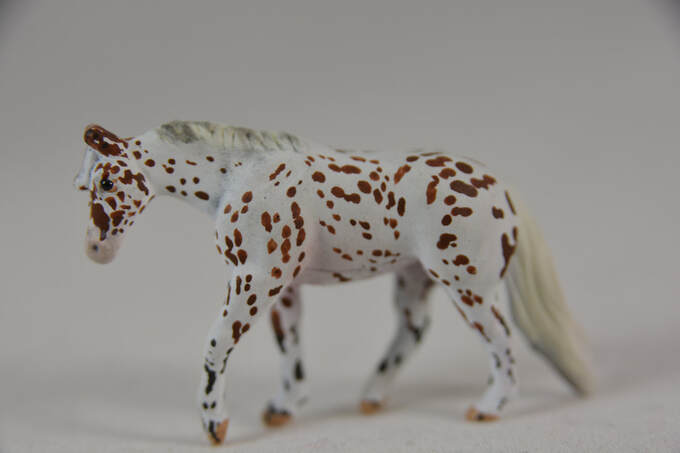
The following tutorial was written in 2016.
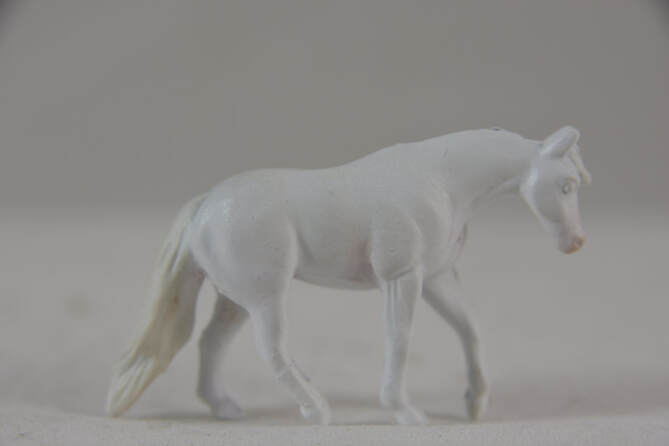
The model used is a Breyer Mini Whinnie Jog Trot Quarter Horse Mare.
The paints used are both the Citadel range from Games Workshop and Humbrol acrylics. For the pricing it is assumed you are using these paints and painting a Stablemate model horse but this tutorial will work for all scales.
Difficulty Level: Beginner
Approximate Cost: £45.00
Shopping List
The Basics
Prepped Model Horse
Paint Brushes
Sealant
Old Brushes or Cotton Buds
Paints
Red Brown
Black
Light Grey
For the eyes/details
White
Black
Brown
Red
Skin Tone/Pale Pink
Light Ochre
Pastels
Pale Yellow
Pale Pink
Black
Prepped Model Horse
Paint Brushes
Sealant
Old Brushes or Cotton Buds
Paints
Red Brown
Black
Light Grey
For the eyes/details
White
Black
Brown
Red
Skin Tone/Pale Pink
Light Ochre
Pastels
Pale Yellow
Pale Pink
Black
The Basics
Step 1
Add pink pastel to the horse's muzzle, eyes, genitals, elbow and stifle. Use reference to see whether your particular horse has pink skin showing anywhere else.
Add a light yellow pastel (ochre mixed with white will work) to the mane and tail.
Seal your model.
Add pink pastel to the horse's muzzle, eyes, genitals, elbow and stifle. Use reference to see whether your particular horse has pink skin showing anywhere else.
Add a light yellow pastel (ochre mixed with white will work) to the mane and tail.
Seal your model.
Step 2
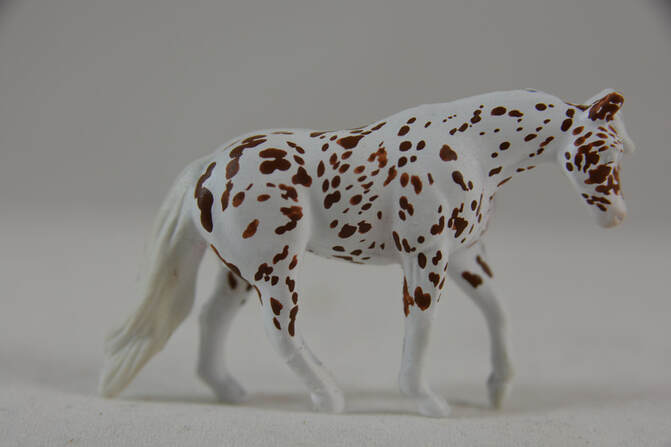
This is where reference is really important. The spots follow the direction of a horse's coat hairs so you need to follow the reference you are using exactly. Note how they don't all face the same way and also how they are not round.
To do a spot add paint to your brush, then hold it at an angle to the horse and place it down. Doing this will give you more of an oval shape than a dot.
Start with a layer of red brown over the body and top of the legs.
Let one side dry fully before doing the other. Use a photo editing app (the Windows photo viewer will work) to 'flip image horizontal' this will make it easier to follow the spot direction on the opposite side!
Step 3
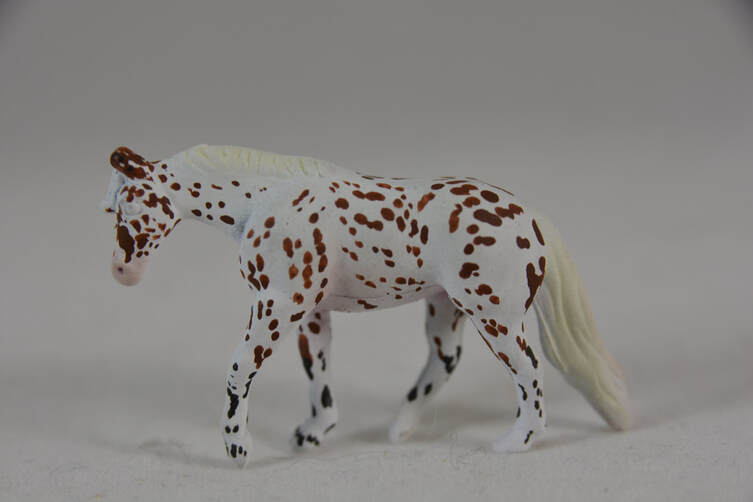
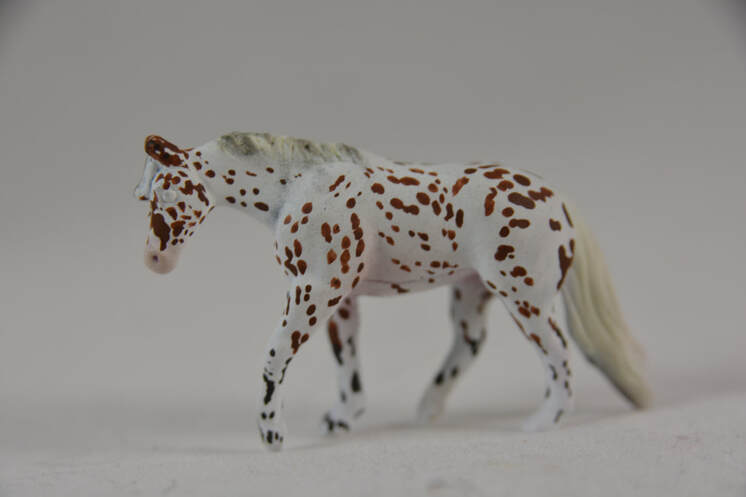
Using the same techniques as Step 2 add black spots to the lower legs. Imagine where black would be on a bay horse, this is where you want the black spots on your model. They should extend just over the knee and hock.
Using the same techniques as Step 2 add black spots to the lower legs. Imagine where black would be on a bay horse, this is where you want the black spots on your model. They should extend just over the knee and hock.
Step 4
Get a black pastel and an old thin brush or cotton bud (please use recyclable ones) and add black pastel in stripes to the mane.
Then add some to the underside of the tail.
Seal your model.
Get a black pastel and an old thin brush or cotton bud (please use recyclable ones) and add black pastel in stripes to the mane.
Then add some to the underside of the tail.
Seal your model.
Step 5
We are now going to add the mottled skin that spotty horses are known for. Get watered down light grey paint and brush that's bristles have spread out. Dab the paint lightly on the brush and then dab lightly over the genitals, muzzle and eyes. See how it creates the mottled look in the photo.
We are now going to add the mottled skin that spotty horses are known for. Get watered down light grey paint and brush that's bristles have spread out. Dab the paint lightly on the brush and then dab lightly over the genitals, muzzle and eyes. See how it creates the mottled look in the photo.
Step 6 - The Hooves
The hooves on spotty horses are usually light coloured with striping. First paint them using a light ochre colour. When you are done use either a completely clumped up brush or a pastel pencil to apply the black pastel stripes. Where the stripes touch the top of the hoof add a little black spot.
The hooves on spotty horses are usually light coloured with striping. First paint them using a light ochre colour. When you are done use either a completely clumped up brush or a pastel pencil to apply the black pastel stripes. Where the stripes touch the top of the hoof add a little black spot.
Step 7 - The Eyes
Start with a base colour of skin tone paint.
Then add a layer of white paint mixed in with a small amount of red.
Then add a round brown iris.
Finally add a black oblong pupil.
Seal your model and it is complete!
Start with a base colour of skin tone paint.
Then add a layer of white paint mixed in with a small amount of red.
Then add a round brown iris.
Finally add a black oblong pupil.
Seal your model and it is complete!
Gallery of Finished Pieces
If you've attempted this tutorial and would like to share an image with us for our gallery please email [email protected]
Make sure to let us know which tutorial you completed and any information (such as your name) you would like included with your picture.
Make sure to let us know which tutorial you completed and any information (such as your name) you would like included with your picture.

